If you don’t have the Ricoh Universal Print Driver, you can search Google or find them at this link.
You will need to choose the 32-bit or 64-bit version of the driver, which matches the version of Windows the computer is running.
Note: When downloading drivers from the web you must run the downloaded file to extract the driver for use. Remember where you put them, you will need this information later.
Start the Add Printer Wizard
Windows 8 or 10:
- Right-click the Start button
- Select Control Panel
- Select View Devices and Printers
- Select Add a Printer, it is on the top bar of the device window
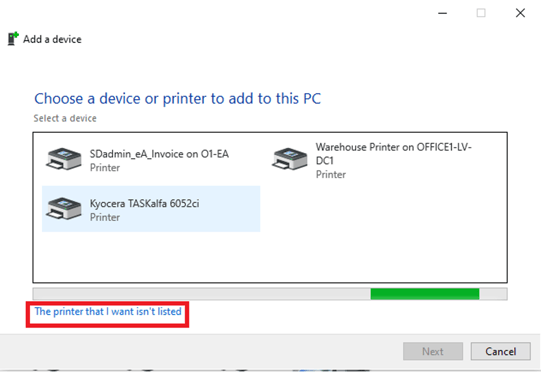
The following will walk you through the Add Printer wizard. Follow through them, selecting the settings in the red boxes.
- Select The Printer that I want isn’t listed
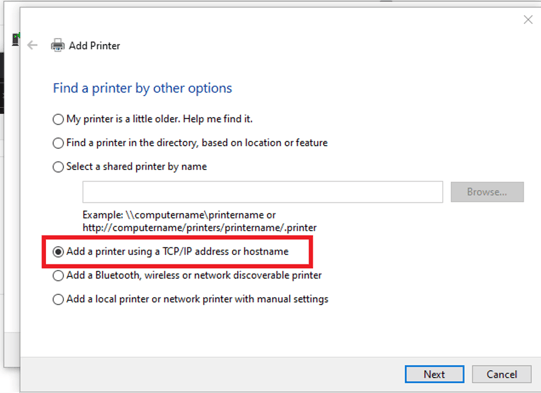
- Select Add a printer using a TCP/IP address of hostname
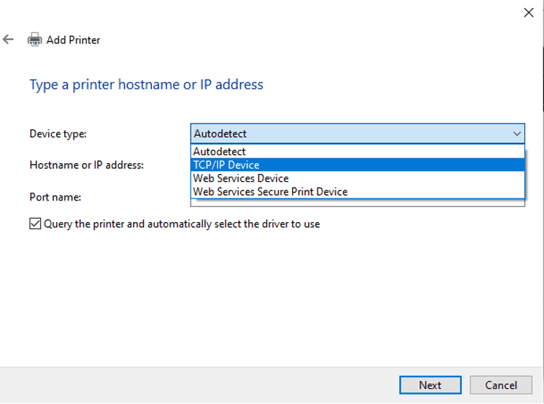
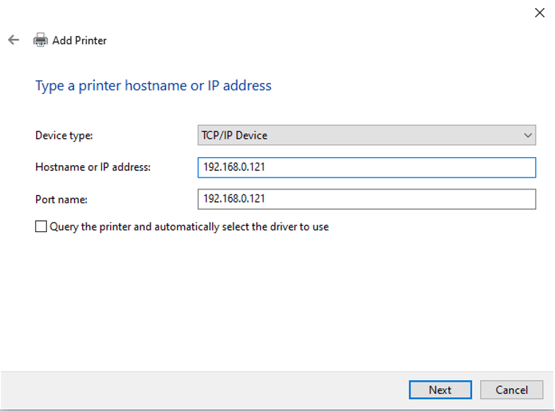
- In the Hostname or IP address field, type in the IPv4 address that corresponds to the copier. The Port name field will automatically fill.
- Be sure to uncheck the “Query the printer” box.
- Check the IP address by typing the address (ex: 192.168.0.121) into your web browser and see if your printer WIM appears.
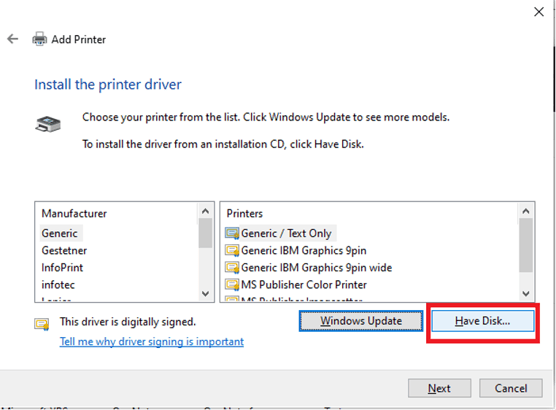
- Click on Have Disk…
Downloading the Ricoh Universal Driver
Step 1: Search Ricoh Universal Print Driver in any web browser
Step 2: Download PCL6 Driver for Universal Print
Step 3: Choose to Run and unzip to your desired location
Step 4: Now you can “Browse” for this folder.
Step 5: Click on the folders “z81458L17” then “disk1” then click on “oemsetup.”
Step 6: Then follow the following steps.
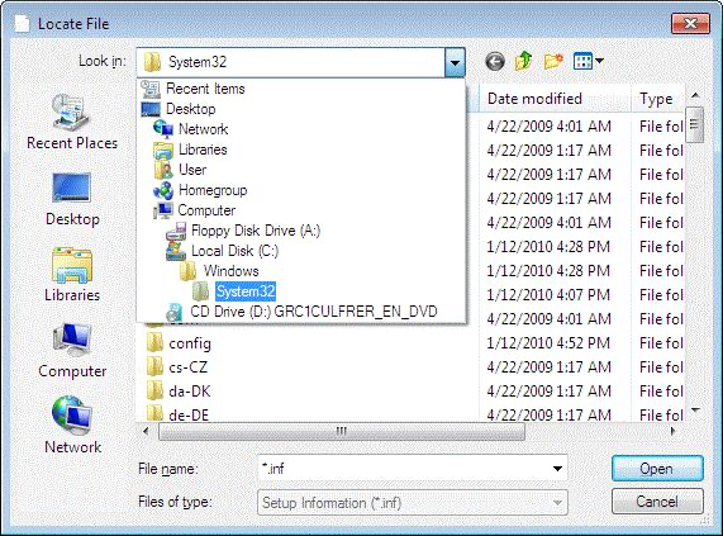
- Click on Browse…

- Browse to the location you extracted the driver to after you downloaded and ran it. When you have found the location of the driver, hit the Open button.
- Click on OK

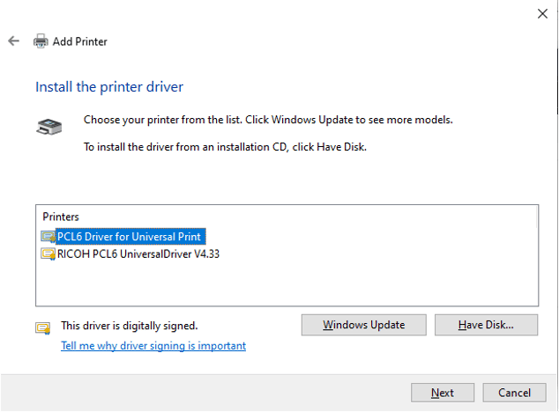
- Choose the first driver, PCL6 Driver for Universal Print and click on Next.
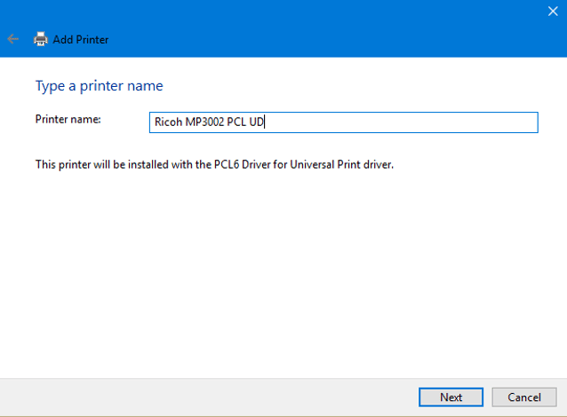
- Click on Next
- Select Do not share this printer, and click Next
(You would only share the printer if installing on a server)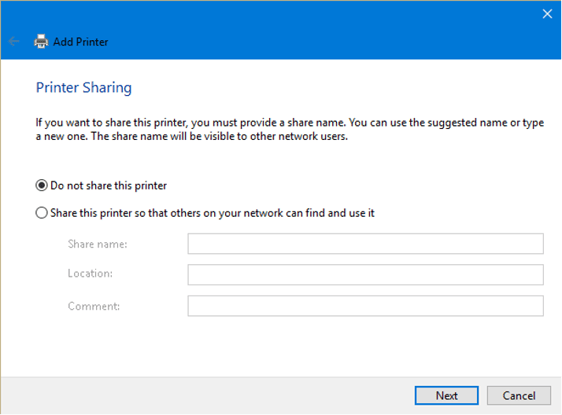
You can also print a test page from this box to confirm connectivity.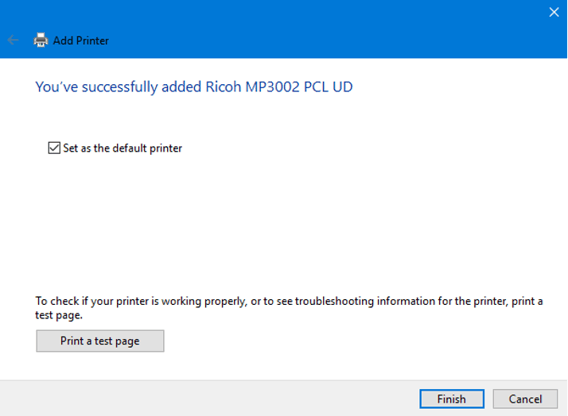
- Click on Finish when complete.
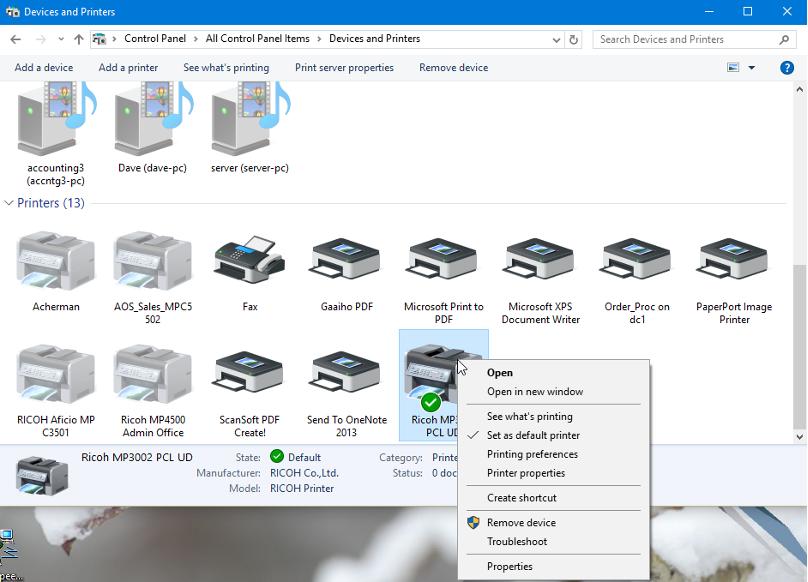
- You will still have the Devices and Printers box open, and you will see the copier you just added.
- Right-click the new copier, and choose Printer Properties
- Click on the General tab, then on the Preferences button.
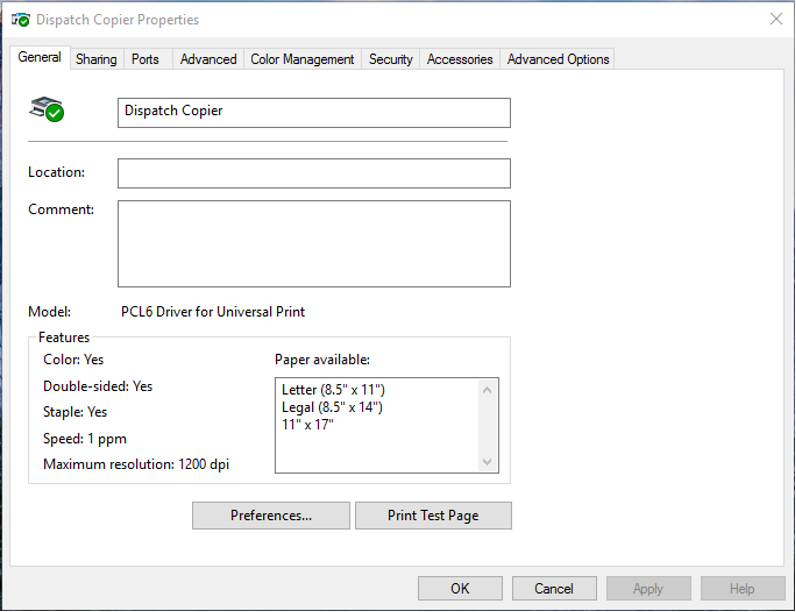
- Sometimes, 2-sided will be On by default. Make sure it is switched to Off
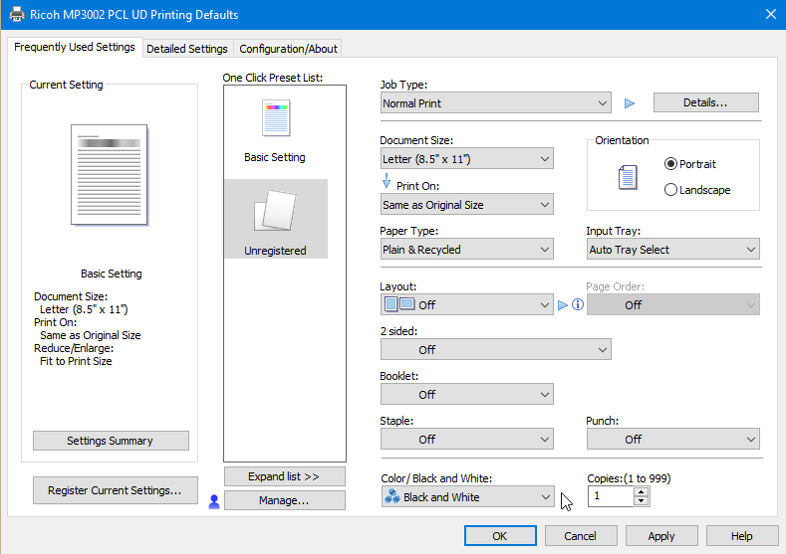
- If it is a color copier, select the default option to Black and White.